
Don't have access to a workshop but still want to make high quality models with almost no tools? Then read PROCESS 2.

PROCESS 1 - Using power tools and wood working machines
The phone here is made form a wood known as Jelutong. Jelutong has a low density and is easy to work with. This type of wood is great for prototypes as it is easy to cut and sand, it is still strong and picks up fine details quite well.
I start with a flat piece of jelutong and use a band saw to cut out the basic shape desired. I sanded the edges with a disk sander to make them consistent and smooth. It is important to plan/ think out the shapes you wish to create and how you can create them. For example- the phone base/ holder consists of three pieces of jelutong stuck together to form an overall shape. It would be very hard to make the base/ holder from a single piece of jelutong- yet I could easily cut out and glue together individual pieces to form a larger piece. I used a milling machine to form the speaker vents. I used a router machine to form the rounded edges.
Once cut, shaped and sanded, the phone was sealed with shellac. Shellac is vital as it seals the wood and stops the paint form being absorbed. Keep applying and sanding back the shellac until there is a smooth and consistent layer covering ALL of the wood parts.
A high gloss finished is achieved by spray painting and polishing. First a spray putty is applied to show up any minor scratches and imperfections. Sand back the imperfections that appear, applying more layers of spray putty if needed. I then use an automotive grade acrylic spray paint can to apply a final layer of paint.
Make sure you read the can's instructions and pay attention to recommended drying times and safety precautions.

PROCESS 2 - THE SKELETON PROCESS... make ANY prototype, with a laser cutter and bog!
With a rapid increase in laser cutting, it makes sense to use it to make models. Laser cutting is prolific in almost all cities worldwide. You can even have your laser cut part mailed to your address if you don't live near a laser cutting facility. Laser cutting offers high precision and virtually any shape, better yet, you only need a sanding block and some bog to make awesome prototypes!
 |
| A series of laser cut components interlock to form a 3D shape. |
NOTE - It may bee a hassle to download and learn these programs at first, but once you do, it will be the easiest and quickest way to make your prototypes.
First off you will need to make a 3D computer model of your prototype. Sketchup is a free 3D modeling program. It is intuitive to use and allows you to easily make a 3D model- visit their website for tutorials if needed.
 |
| 123D Make screenshot. |
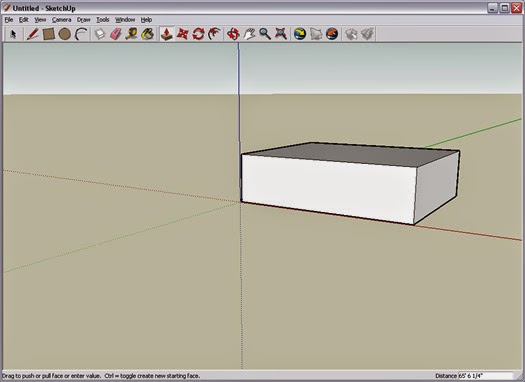 |
| Sketchup screenshot. |
Save your model as a '.dxf' file. This free software (called 123DMake) easily converts the '.dxf' file into a 'skeleton' (AKA a series of inter-locking pieces). The software will then give you a 2D layout of all the pieces which you can then laser cut from a sheet of plastic or MDF. Each part will fit together, it should look just like the above image.
 |
Left image: part has been bogged and is ready to
sand.
Above image: part has been sanded back,
imperfections have been re-bogged.
|

NOTE- the picture below of the bogged and sanded model is not ready to be pained. All of the chips / imperfections in the model will need to be re-bogged and re-sanded if you want a respectable model. NEVER think you will be able to 'hide' any imperfections through the painting process. Paint will only reveal the imperfections even more.

Painting of the model was the same as the above phone- spray putty to remove any scratches and 2 to 3 coats in your spray paint of choice. The laser cutting cost me $30 and bog cost $20. It took about 1 hour to apply bog and 6 hours to sand back.


I greatly appreciate it when readers (this means YOU) share, like or comment on this blog. It only takes you a few seconds yet means lots and helps this site grow, thank you.
Hey, love this tutorial, going to use the lazer cutter at work while on my placement. Keep it up!
ReplyDelete