
This is advice that will be applicable across all rendering software as I will be showing you how and what gives realism to a render, so you can apply it to all of your models in any scenario and any rendering software...
I have actually made this lamp in real life and it LOOKS AWESOME! Stay tuned as I will be uploading pictures and explaining how it was made very soon!

Simply, if you use the standard settings in your CAD rendering software, it won't result in something realistic. Often changing just one setting can have drastic implications on the renders realism.
Inexperienced render-ers will often go for a 'high-gloss' look (even the generic settings of most rendering software is a little high-gloss trigger happy). This may seem to look awesome, but won't necessarily look realistic.
Turn down the reflectivity of your parts and give them textures. If you want to render a cast aluminium part, simply imagine what it would look like in real life. There would be very dispersed and faded reflections and shading, along with a 'sandblasted' texture. Changing the settings that control these variables would give the best representation of the cast aluminium part...
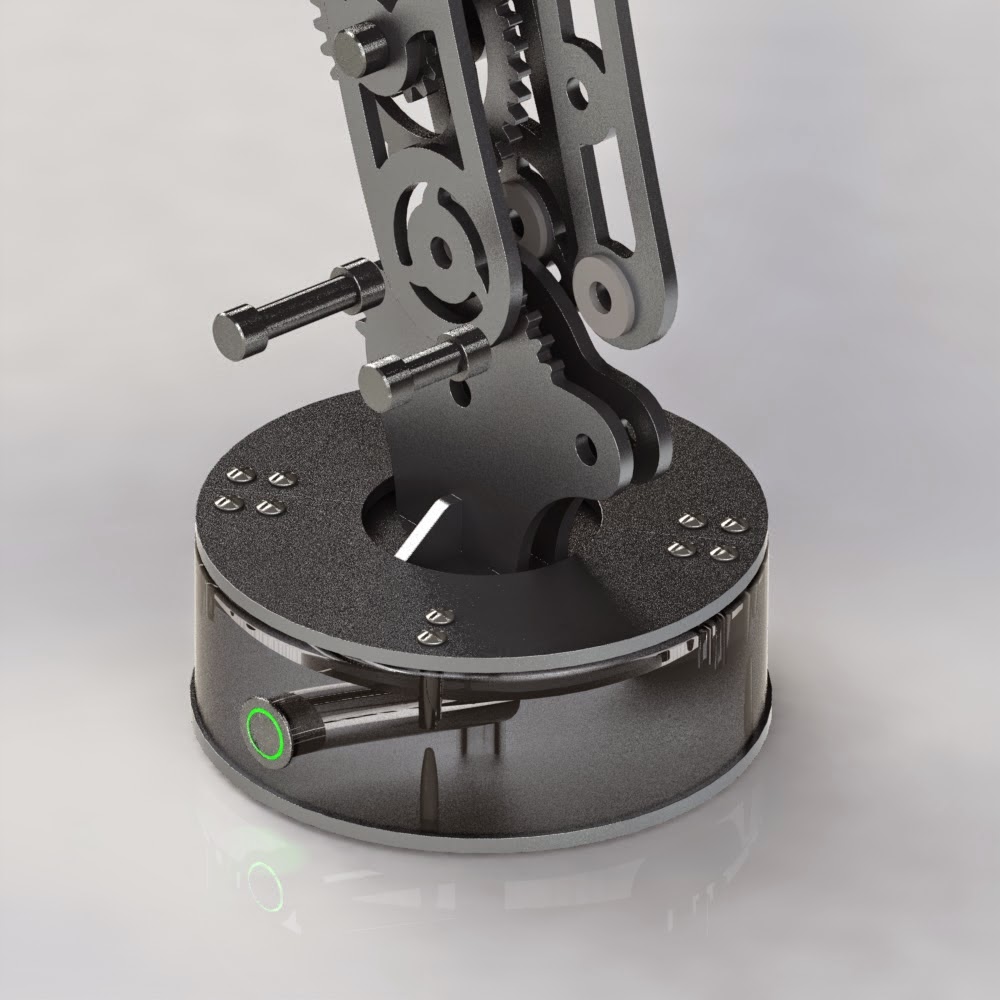 |
Adjusting the textures and reflectivity will help
portray the exact surface you are representing.
Here I dulled down the reflectivity, blurred the
shading / reflections and gave a texture that
represents a sand blasted finish...
|
It may be beneficial to reduce or remove floor reflections as almost no photo shoot / studio floor is highly reflective- so why would you want to render it that way? As mentioned before, think of exactly what surface you want to portray with your render. How would it look in real life? What makes it look that way?
If your software uses them, add a camera to the render (Solidworks' 'Photoview 360' have them as a separate option while 'Keyshot' has cameras built in). Then adjust the camera angle / perspective. Usually a 75mm to 125mm angle lens will work well for desk lamp sized objects. You may want to add a focal point / field of view. This will allow the camera to focus on a specific area and blur the foreground / background.
Before investing truck loads of time into a high resolution render, do a low resolution render (don't change any settings though- as that would change to outcome of the render... only resolution) to make sure everything is looking how you want it to. Once you are satisfied with the result, then go for an all-in high resolution render.
Sometimes a render can take a very long time; culprits that cause long render times are glass objects or using the 'direct caustics' and 'bloom' options. Also, changing from glass as the material to clear plastic will greatly speed up renders, and it will still look like a glass-like object. For a tutorial on using SolidWorks to make a fully rendered animation, click here.
 |
| A contrast between the high gloss middle band and low gloss / textured top and bottom parts gives the render a new dynamic and adds to the realism. |

Don't forget to support Design for Students- whether it is by leaving a comment, asking a question, sharing the page on Facebook/ Google+ or any means you know how. Even if it is only one comment/ share it really means a lot to me. Thanks.
No comments:
Post a Comment